A cracked grout line rarely means the tile itself failed. It usually points to something that went wrong weeks earlier, in a subfloor that was never tested for moisture or a slab that got tiled before it finished curing. That kind of damage stays hidden until it’s already expensive to fix. At Silver Bo Stone, our process is built around catching these issues long before they reach that point.
This blog explores the technical standards, permit rules, and site conditions that actually determine whether a tile floor will last for decades or fail within a year. We’ll look at subfloor prep, moisture and quality control, according to real industry standards from professional installers, plus the direct questions worth asking before you hire anyone to do the job.
The Benefits of Local Installation for Tile Flooring
Professional tile installation is governed by published industry standards, not guesswork, and a local flooring company that works these standards daily catches deviations before they become expensive. Someone who installs tile in dozens of homes in the same region develops a working knowledge of which subfloor types, framing ages, and moisture conditions crop up most often.
Local tile installation also removes a layer of risk that homeowners rarely think about until it’s too late: accountability. A crew with a physical showroom and a reputation connected to that specific area has every reason to do the substrate prep right the first time, because a callback is not an abstraction; it’s a drive down the road.
Local Knowledge: How Kingston’s Climate Affects Tile Installation
Tile installation relies heavily on two things most homeowners never see: the length of substrate cure, and the amount of moisture trapped beneath it. In a region where damp weather prevails for months at a time, these two variables do not behave the same way as in a dry climate.
Concrete Cure Times in a Damp Climate
Industry guidance calls for concrete slabs to cure a minimum of 28 days at roughly 70°F before installing tiles. The reason behind this is that as the slab hardens, it continues to shrink and release moisture. It is slowed by continued local moisture, meaning a slab that looks ready might still be giving off vapor below the surface.
Why Moisture Testing Matters Before Tiling
Skipping a relative humidity check on a new slab is one of the most common reasons for bond failure. If tile is installed before trapped moisture has a chance to escape, moisture has nowhere to go, and it will eventually push against the thinset, resulting in hollow spots, cracked grout, or tiles that lift up altogether.
One improperly cured slab is all it takes to turn a finished floor into a redo within the first year.
Faster Turnaround Times With a Local Installation for Tile Flooring
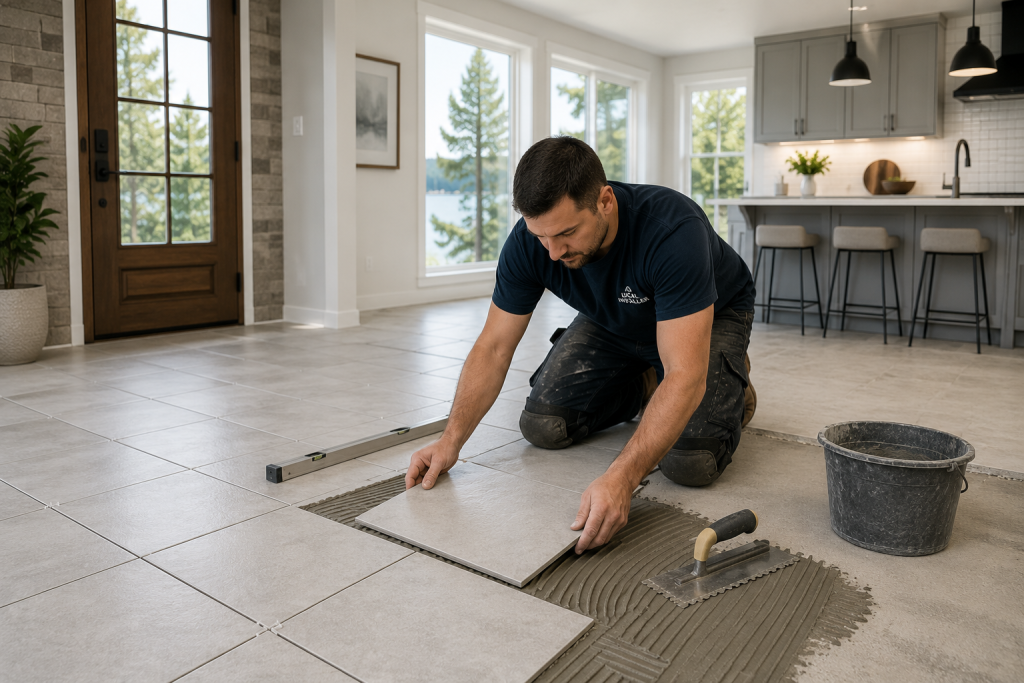
A realistic tile installation timeline involves several sequential stages: substrate inspection, waterproofing membrane application where needed, thinset cure, tile setting, and grout cure. Skipping ahead on any one of these steps to save a day almost always costs more time later in repairs.
A local flooring company schedules these stages without losing days to travel logistics or delayed material shipments from an out-of-area supplier, which keeps the project moving without cutting corners on cure times that simply cannot be rushed.
Personalized Service and Communication With Local Installers
Custom tile installation, mixed patterns, waterfall transitions, or matched veining across a large run of tile depends on face-to-face conversations that are difficult to replicate over email. At Silver Bo Stone, our showroom lets homeowners handle actual material samples before committing to a layout.
Because of that direct relationship, changes that come up mid-project get worked out the same day, not routed through a call center and a project manager who’s never seen the site.
How Local Installers Handle Permits and Building Codes
Straightforward tile replacement is generally considered cosmetic work and does not require a permit alone. But as soon as the project involves plumbing, drain relocation, or framing of the subfloor, it enters a realm that does.
A Kitsap County flooring installer familiar with local code knows exactly where that line sits:
- Replacing existing floor or wall tile: typically no permit needed
- Moving a shower drain or relocating plumbing fixtures: permit required
- Structural subfloor repairs or framing changes: permit required
- Additions that increase floor area: require full plan review
It’s not just a stop-work order you risk by skipping a required permit. It can come up later when a home is being sold, when an uninspected plumbing change becomes a disclosure problem for the seller.
Quality Control: What Sets Local Installation Apart
Tile installation quality is objective, not subjective. National standards specify how flat a substrate should be, the amount of mortar in contact with the tile and the location of movement joints, the fine points that distinguish a floor that will last from one that looks good on installation day.
Mortar Coverage and Substrate Flatness
The industry standard is at least 80 percent mortar coverage under tile in dry areas, and 95 percent in wet areas such as showers and bathroom floors. Substrate flatness tolerance is typically 1/4 inch over 10 feet; anything more than that creates voids that appear as cracks when walked on.
Movement Joints and Deflection Limits
The floor structures should have a deflection limit of L/360 ( the floor can not flex more than a certain amount under load ). Movement joints are required at each perimeter and about every 25 feet indoors. Skip these and thermal expansion will eventually crack the grout in a straight, tell-tale line.
| Detail Checked | Standard Practice | Corner-Cut Practice |
| Mortar coverage (wet areas) | 95% contact | Spot-applied, gaps left |
| Substrate flatness | 1/4″ over 10 ft | Unchecked |
| Movement joints | Every ~25 ft | Omitted entirely |
| Concrete cure before tiling | 28 days minimum | Tiled early to save time |
Supporting Local Installation for Tile Flooring in Kingston
Choosing a Kingston, WA flooring contractor keeps the relationship close enough that follow-up is never a hassle. For residential tile installation, that proximity matters more after the job is done than during it, when small adjustments or questions come up months later.
Donny Hurd, our owner, was born and raised in the Pacific Northwest and has spent his career designing kitchens and bathrooms for homeowners across this region, the kind of local track record that only holds up when the work itself holds up.
Warranty and Long-Term Support From Local Companies
A tile installation warranty is only as reliable as the company standing behind it years later. A business with a fixed local address and an ongoing reputation to protect has a direct incentive to make that warranty mean something, rather than treating it as fine print.
What to Look for When Hiring a Local Installation for Tile Flooring
Before signing anything, confirm the basics that separate a dependable local flooring company from a risky one:
- A visible, physical showroom or business address
- Willingness to explain subfloor prep and moisture testing before starting
- Verifiable flooring company reviews, not just testimonials on their own site
- A written warranty with clear terms, not a verbal promise
Questions to Consider Before Hiring a Tile Flooring Installer in Kingston
A short conversation upfront can prevent months of frustration later. Before hiring, ask:
- How do you test subfloor moisture before installing tile?
- What does the tile installation cost typically depend on for a project like mine?
- Can you walk me through your tile flooring installation process step by step?
- What’s covered under warranty, and for how long?
- Do you handle permit questions if my project needs one?
FAQs About Local Tile Flooring Installation
- Is bathroom tile installation in Kingston different from other rooms?
Yes. Wet-area floors require higher mortar coverage and waterproofing membranes that dry areas don’t need.
2. How about Kingston kitchen tile installation?
Kitchens typically have larger open spans, so substrate flatness and movement joints are especially critical to prevent cracking.
3. Can you put tile directly on an OSB subfloor?
Generally, no. Industry standards consider direct bonding to OSB high-risk and typically require an uncoupling membrane or a plywood layer first.
4. Do I need a permit just to replace tile?
Usually not, unless the project involves moving plumbing or altering the subfloor structurally.
Making the Right Call for Your Kingston Flooring Project
A tile floor that lasts for decades comes down to details most homeowners never see: cure times, mortar coverage, moisture testing, and code compliance. Skipping any one of these steps doesn’t just risk a cosmetic issue; it risks a floor that fails within a year and costs more to redo than it would have cost to do properly from the start.
At Silver Bo Stone, we’ve spent nearly 24 years as a locally owned, family-operated business, and over 90% of our new work comes from referrals. Our showroom lets homeowners see and feel our stone and tile selection in person, with a team that manages every stage of the installation directly.
If you’re ready to talk through your project, we’re here to help. (360) 297-4080